07 July 2014

The New Annual Catalogue is Here!

Click here to see it.
My first order is due any day, I can't wait!

12 February 2014

A Simple Cute Girls Birthday Card

My niece turns 9 next week so needed to send her a card and used this one for inspiration.  It was really simple and quick to make, love the butterflies wings!
Stamps: Gorgeous Grunge, Sassy Salutations
Cardstock: Whisper White, Vellum Cardstock
Ink: Melon Mambo, Tempting Turqoise, Summer Sun, Old Olive
Accessories: Big Shot, Beautiful Wings Embosslits

29 January 2014

Scrapbooking Sale-A-Bration Style


This is the only scrapbook page which I managed to complete in the school holidays.  Am loving the new FREE Designer Series Paper called Sweet Sorbet, that hint of Basic Black just makes it pop!
Stamps: One of a Kind, Remember This and That Rotary Stamp
Cardstock: Whisper White, Pool Party, Calypso Coral, Basic Black, Sweet Sorbet DSP
Ink: Soft Suede, Pool Party
Accessories, Big Shot, Labels Collection Framelits Dies, Expressions Thinlits Dies, Beautiful Wings Embosslits, Sponge Dauber, Basic Rhinestones, Word Window Punch

Sale-A-Bration is Here!

Earn free exclusive products during Sale-A-Bration, Stampin' Up!'s annual sales event with perks for shopping, hosting a party, or joining Stampin' Up!  Take advantage of all it has to offer from 28 January until 30 March.  For every $110 (New Zealand) you spend, you get to choose a free Sale-A-Bration gift!

07 December 2013

Another Stampin' Up! Christmas Tree!


This was my second entry in the Paeroa Christmas Tree Competition.  It sits on a round base made with chipboard and Very Vanilla cardstock, heat-embossed with Baroque Motifs in gold.

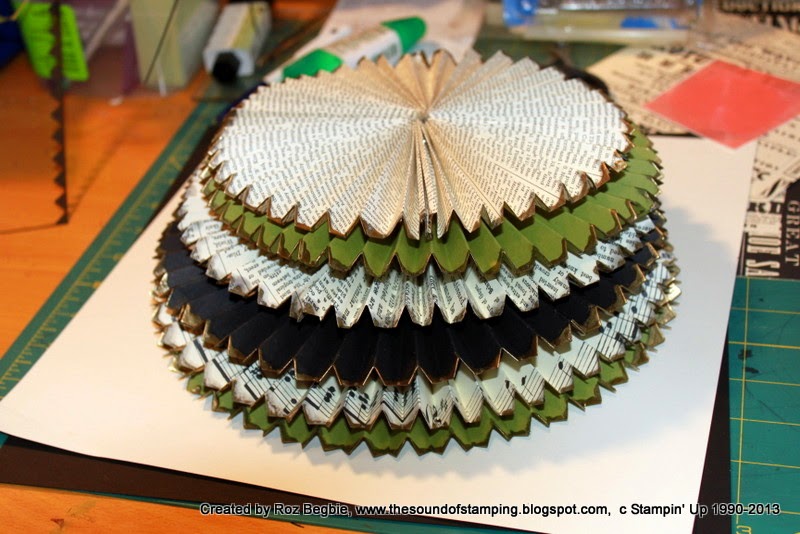
I started making rosettes using the Designer Rosette Bigz XL Die, starting with 12" strips 6" wide, and decreased these by 1/4" each layer down to 1/2" wide.
The end of each strip of rosette was scrunched up with versamark ink applied directly from the bottle, then dipped in gold embossing powder and heated.  This was quite time-consuming but very effective!

4 strips of cardstock or DSP were needed to made a whole rosette for the wider layers at the bottom which was decreased to 2-3 layers as I got closer to the top.  I used Tombow (which glue like PVA) to join strips together.
The trusty glue-gun was my adhesive of choice, both for holding rosettes together in the middle, then for attaching layers together.  It was such a strong adhesive that the hole "tree" could be turned upsidedown when finished!

The retired Elegant Bird die became the dove on the top of the tree.  I cut 3 circles with my 1 1/4" punch to attach bird to tree.
Last touches were made with a snowflake punch and glimmer paper.  The whole tree took about 1 day to make and sits about 40cm tall.
Stamps: Baroque Motifs
Cardstock: Very Vanilla, Basic Black, Old Olive, Newsprint/First Edition DSP, Champagne Glimmer Paper
Ink: Versamark
Accessories: Big Shot, Designer Rosette Bigz XL Die, Elegant Bird Die, Chipboard, Snowflake Punch, 1 1/4" Circle Punch, Gold Embossing Powder, Heat Tool

30 November 2013

"Jesus is the Reason for the Season" Stampin' Up! Christmas Tree

There is a Decorated Christmas Tree competition happening in Paeroa at the moment and this is my entry in the "Spirit of Christmas" category.  The competition is being run by Paeroa Christmas Lights Show and the Paeroa Skate and Leisure Centre.  I'm also entering this in this weeks Just Add Ink inspiration challenge.  I have made another tree in the "Peace" category which I will share soon.

"The Tree"
I started off with some manilla paper which comes in the Stampin' Up boxes, along with a frame made from the actual box.
I stamped all over it using the big flourish stamp from Baroque Motifs with White Craft Ink.  I tried using the flourish from Creative Elements but felt it looked better with the bolder flourish.
I then made a cylinder with the paper and placed over the frame.  I didn't attach the paper to the frame as it sat there just fine.
" The Leaves"
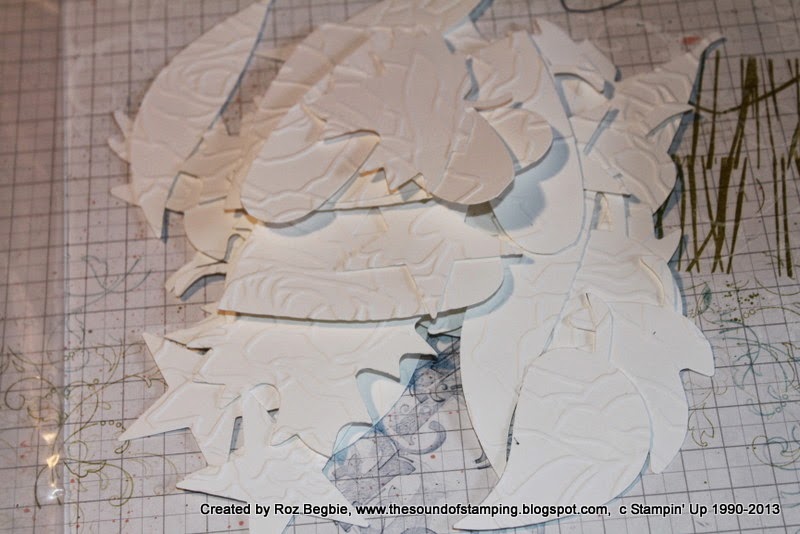
I cut out approx 200 leaves using Leaves #2 die (retired but there is a similar current one called Autumn Accents in the catalogue).  I think I used about 7 pieces of 12x12 Whisper White cardstock.
They were embossed using Manhattan Flower embossing folder:
Then I applied glue stick over the raised area and blinged them up using Dazzling Diamonds Glitter.  This was the most time consuming part.  I took about 30mins to process one piece of 12x12 cardstock into leaves that I could stick on the tree, and that was only 32 leaves!

Then starting from the bottom, I stuck leaves on the tree with 1-2 glue dots.  I didn't want heaps of adhesive on them as I wanted them to stick out from the tree.  I also wanted the background to peep through too.

 "The Lazy Susan"
I needed a platform to manage the tree by this stage as I was getting glitter everywhere trying to stick leaves on the tree  :) so had a go at making a Lazy Susan using chipboard and Basic Black cardstock.

This was my first attempt at doing the "ball-bearing" part, unfortunately I accidently deleted the photo from my better second attempt.  I used pearls threaded with cotton thread and attached as you see in this photo.  The sellotape wasn't a strong enough adhesive to hold cotton thread so in the second attempt I placed sticky tape (double-sided) under crochet thread with sellotape on top which held it much better.
 
 Parts put together with a nice long brad.
 And voila!


I didn't end up putting feet on it (was thinking about using buttons) as it is sitting nice and flat on the brad head.

"The Star"
Using the Lattice die I cut out 2 each of silver and champagne glimmer paper with a vellum cardstock square.
 Using glue dots I stuck them all together alternating silver and champagne on each side.
 "Putting it all Together"
The story I wanted to tell on the tree was that of the baby Jesus being born, his ministry, his gift of salvation through his death on the cross, rising from the dead and how people can accept his gift of eternal life (www.needgod.com).  I found images on google which supported these themes and used My Digital Studio to made them the right size for printing.  They were then cut out using Labels Collection Framelits Dies framed on Real Red cardstock.  I printed out bible verses to correspond with each picture and cut them out with the Ovals Collection Framelits.

I used sticky strip to attach the tree frame to the lazy susan, with the cylinder sitting on top.  Then the verses and pictures were all attached to Real Red ribbon using sticky strip (glue dots didn't have enough stick).  Then with sticky strip along the back of the ribbon, starting at the top I wound the ribbon around the tree leaving extra ribbon to wind around the base.
As a final note, I have to say that I never truly realised how beautiful Stampin' Up's Dazzling Diamonds glitter is.  It's colourless but when light shines on it, a rainbow shines back!

This project took me about 2 days to complete and stands 65cm high.  Hope you enjoy!

Undefined Stamp Carving

Click here to see flyer
Have you ever wanted a stamp but couldn’t find the perfect image?  Well now you can create the perfect image! Undefined is Stampin’ Up!’s new stamp carving product line. You define the rubber stamp any way you want.  Available to order now.

29 November 2013

Sympathy Card for a Friend

My dear friend Tina lost her Mum recently so I made this card for her.  She just loved the card and wanted to know all about how I made it as she is getting into cardmaking more and more.  I cased this card on Pinterest for inspiration.

Stamps: Sassy Salutations, God's Blessings, Creative Elements
Cardstock: Very Vanilla, Soft Suede, Crisp Cantaloupe
Ink: Soft Suede, Crisp Cantaloupe
Accessories: Big Shot, Lattice Bigz Die, Labels Collection Framelits Dies, Boho Blossoms Punch, Spritzer Tool, Basic Pearls

26 November 2013

Boy's 10th Birthday Card

Pinterest sparked more inspiration for me with this cool card which I adapted with a 10 on it for my son's birthday recently.  He played Saturday morning soccer for the first time this year so this card was perfect!

Stamps: Itty Bitty Banners, Inspired by Nature
Cardstock: Whisper White, Old Olive, Marina Mist, Basic Black
Ink: Marina Mist
Accessories: Big Shot, Bitty Banners Framelits, Honeycomb Embossing Folder, Simple Numbers Bigz Dies, Cloudy Day Embossing Folder, Ribbon