Scrapbooking, Cards & Other Creations with Roz Begbie, Stampin' Up! Demonstrator
Showing posts with label 3D Projects. Show all posts
07 December 2013
Another Stampin' Up! Christmas Tree!
This was my second entry in the Paeroa Christmas Tree Competition. It sits on a round base made with chipboard and Very Vanilla cardstock, heat-embossed with Baroque Motifs in gold.
I started making rosettes using the Designer Rosette Bigz XL Die, starting with 12" strips 6" wide, and decreased these by 1/4" each layer down to 1/2" wide.
The end of each strip of rosette was scrunched up with versamark ink applied directly from the bottle, then dipped in gold embossing powder and heated. This was quite time-consuming but very effective!
4 strips of cardstock or DSP were needed to made a whole rosette for the wider layers at the bottom which was decreased to 2-3 layers as I got closer to the top. I used Tombow (which glue like PVA) to join strips together.
The trusty glue-gun was my adhesive of choice, both for holding rosettes together in the middle, then for attaching layers together. It was such a strong adhesive that the hole "tree" could be turned upsidedown when finished!
The retired Elegant Bird die became the dove on the top of the tree. I cut 3 circles with my 1 1/4" punch to attach bird to tree.
Last touches were made with a snowflake punch and glimmer paper. The whole tree took about 1 day to make and sits about 40cm tall.
Stamps: Baroque Motifs
Cardstock: Very Vanilla, Basic Black, Old Olive, Newsprint/First Edition DSP, Champagne Glimmer Paper
Ink: Versamark
Accessories: Big Shot, Designer Rosette Bigz XL Die, Elegant Bird Die, Chipboard, Snowflake Punch, 1 1/4" Circle Punch, Gold Embossing Powder, Heat Tool
Labels:
3D Projects,
Baroque Motifs,
Big Shot,
Christmas,
Designer Series Paper,
Embossing,
Punches
30 November 2013
"Jesus is the Reason for the Season" Stampin' Up! Christmas Tree
"The Tree"
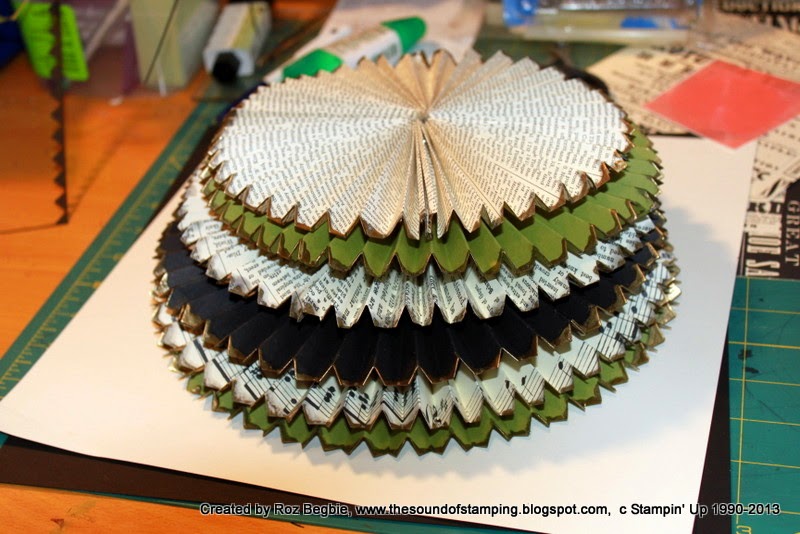
I started off with some manilla paper which comes in the Stampin' Up boxes, along with a frame made from the actual box.
I stamped all over it using the big flourish stamp from Baroque Motifs with White Craft Ink. I tried using the flourish from Creative Elements but felt it looked better with the bolder flourish.
I then made a cylinder with the paper and placed over the frame. I didn't attach the paper to the frame as it sat there just fine." The Leaves"
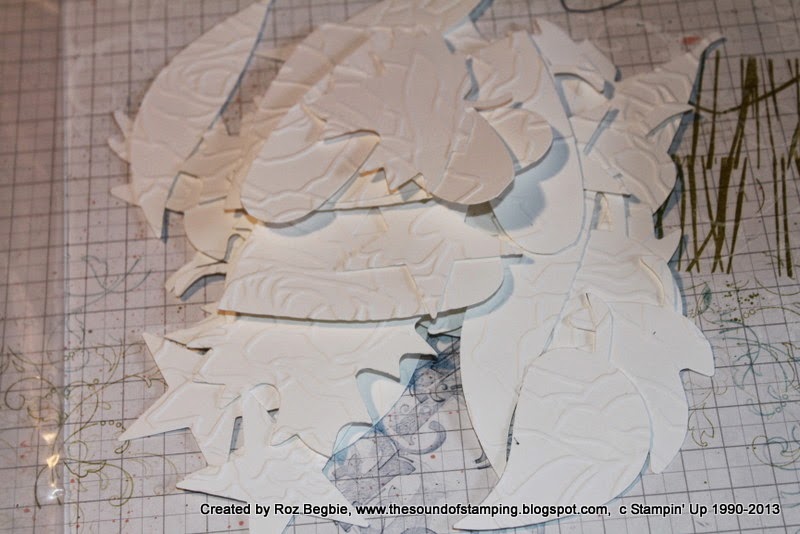
I cut out approx 200 leaves using Leaves #2 die (retired but there is a similar current one called Autumn Accents in the catalogue). I think I used about 7 pieces of 12x12 Whisper White cardstock.
They were embossed using Manhattan Flower embossing folder:
Then I applied glue stick over the raised area and blinged them up using Dazzling Diamonds Glitter. This was the most time consuming part. I took about 30mins to process one piece of 12x12 cardstock into leaves that I could stick on the tree, and that was only 32 leaves!
Then starting from the bottom, I stuck leaves on the tree with 1-2 glue dots. I didn't want heaps of adhesive on them as I wanted them to stick out from the tree. I also wanted the background to peep through too.
"The Lazy Susan"
I needed a platform to manage the tree by this stage as I was getting glitter everywhere trying to stick leaves on the tree :) so had a go at making a Lazy Susan using chipboard and Basic Black cardstock.
This was my first attempt at doing the "ball-bearing" part, unfortunately I accidently deleted the photo from my better second attempt. I used pearls threaded with cotton thread and attached as you see in this photo. The sellotape wasn't a strong enough adhesive to hold cotton thread so in the second attempt I placed sticky tape (double-sided) under crochet thread with sellotape on top which held it much better.
Parts put together with a nice long brad.
And voila!
I didn't end up putting feet on it (was thinking about using buttons) as it is sitting nice and flat on the brad head.
"The Star"
Using the Lattice die I cut out 2 each of silver and champagne glimmer paper with a vellum cardstock square.
Using glue dots I stuck them all together alternating silver and champagne on each side.
The story I wanted to tell on the tree was that of the baby Jesus being born, his ministry, his gift of salvation through his death on the cross, rising from the dead and how people can accept his gift of eternal life (www.needgod.com). I found images on google which supported these themes and used My Digital Studio to made them the right size for printing. They were then cut out using Labels Collection Framelits Dies framed on Real Red cardstock. I printed out bible verses to correspond with each picture and cut them out with the Ovals Collection Framelits.
I used sticky strip to attach the tree frame to the lazy susan, with the cylinder sitting on top. Then the verses and pictures were all attached to Real Red ribbon using sticky strip (glue dots didn't have enough stick). Then with sticky strip along the back of the ribbon, starting at the top I wound the ribbon around the tree leaving extra ribbon to wind around the base.
As a final note, I have to say that I never truly realised how beautiful Stampin' Up's Dazzling Diamonds glitter is. It's colourless but when light shines on it, a rainbow shines back!
This project took me about 2 days to complete and stands 65cm high. Hope you enjoy!
30 October 2013
I was a winner a JAI!
I didn't get around to posting this last week as our overhead telephone line was hit by a TRACTOR so we didn't have a phone or internet for a few days!
But just wanted to say a big thanks to the ladies at JAI who loved my Christmas Cotton Reel Wreath!
15 October 2013
JAI # 186 Inspiration Challenge - A Christmas Wreath
Well this project is a little (heaps) different for me! It's an extremely eclectic mix of unusable bobbins, spools, reels, lace, buttons and ribbon along with Stampin' Up! retired Designer Series papers and a little stamping to boot!
Many of the cotton spools are VERY old, having come from sewing boxes which belonged to both of my Nana's. What a wonderful way of being able to display and remember them, especially at Christmas time!
This challenge on JAI was an inspiration challenge with the following photo of a gorgeous wreath:
Stamps: Heart of Christmas, Gorgeous Grunge
Colours: Real Red, Old Olive, Baja Breeze, Very Vanilla, Crumb Cake
Main Accessories: Big Shot, Top Note Die, Ovals Collection Framelits, Linen Thread, Crumb Cake Tulle Ribbon, Chipboard, Wire, Sponge Dauber
29 January 2013
Teacher Gifts
The kids have started back at school today and I'm enjoying the day with only Mr 2 at home, and having a tidy house again!
For the teacher's gifts last year I decided to recycle two lovely shaped coffee packet boxes into works of art, from this:
To this:
I filled them up with Cadbury favourites chocolates, yum!
For the teacher's gifts last year I decided to recycle two lovely shaped coffee packet boxes into works of art, from this:
To this:
I filled them up with Cadbury favourites chocolates, yum!
19 November 2012
Birthday Banner
I decided to make a Happy Birthday Banner to display during the week of any birthdays occuring in our household so I whipped this baby up in no time at all using the Perfect Pennants Die!
A project like this is also a great way to use up scraps from retired designer series paper and cardstock. It looks lovely up, I might just have to try a Merry Christmas one too!
Cardstock: Pool Party, Peach Parfait, Whisper White, Poppy Parade, Everyday Enchantment DSP
Accessories: Big Shot, Perfect Pennants Bigz L Die, Calypso Coral Ribbon
19 March 2012
Simply Adorned
After feeling inspired by Australian Demo Deb Speijers, I had to have a go at creating jewellry! Technically we just making the inserts, but Deb took it a step further and made a folder to hold and display the inserts. I had fun one afternoon going through many of my stamp sets and designer series paper and coming up with different designs.There are a couple in there which I made for my daughter Georgia as she loves to wear my necklace too!
The Simply Adorned range of jewellry, currently available in the Summer Mini Catalogue will not be continued after the catalogue ends on 31 March so any orders will need to be in by then.
FOLDER
Cardstock: Soft Suede, Everyday Enchantment DSP
Ink: Soft Suede
Accessories: Big Shot, Timeless Type Junior Alphabet Dies, Blossom Party Originals Die, Scallop Square Bigz Clear Die, Everyday Enchantment Ribbon & Brad Pack, Sponge Dauber, Slit Punch (Retired), Simply Adorned 61cm Chain, Simply Adorned 2.5x3.2cm Charm
Stamps:
18 March 2012
Just Add Altered Art...
Further to my post from yesterday, I thought I'd enter this month JAI Scrapbook Challenge as well: Altered Art. I'm hoping they don't mind me entering with my "made the page first then had it framed" entry!I made this page recently as I really wanted a way to display my children's school/daycare photos and be able to change them easily each year. I chose neutral colours, only adding brighter colours for each child's initial. I then had it framed so the glass was slightly off the page and also able to open at the back. I was very happy with the result!
The photos aren't the best sorry, I had trouble photographing it because of the glass on the front.
Stamps: En Francais, Broadsheet Alphabet, Word Play
Cardstock: Very Vanilla, Early Espresso, Crumb Cake, Marina Mist, Wild Wasabi, Regal Rose, Daddodil Delight
Ink: Early Espresso, Crumb Cake, Marina Mist, Wild Wasabi, Regal Rose, Daddodil Delight
Accessories: Big Shot, Lots of Tags Sizzlits Die, XL & X Tag Punches, Beautiful Wings Embosslits Die, Sponge Dauber, Spritzing Tool, Basic Pearls
20 February 2012
Tina's Card Organiser
I have been doing lots of crafting over the holidays and virtually no blogging so it's about time I caught up!
I made this birthday book/card organiser as a thank you for my lovely friend Tina.
Check out the instructions on how to make this project here.
Cardstock: Whisper White, Cheerful Treat DSP
Ink: Melon Mambo
Accessories: Big Shot, Scallop Square Bigz Die, Timeless Type Junior Alphabet Sizzlits Dies, Manhatton Flower Embossing Folder, Chipboard, Scallop Circle Punch, 5 Petal Flower Punch, Paper Daisies, 1/4" White Grosgrain Ribbon (dyed with Melon Mambo ink), Sponge Dauber, Rhinestone
22 April 2011
Wedding "Extras"

She asked me to do her seating plan and after some research on google came up with this:


Stamps: Baroque Motifs
Cardstock: Very Vanilla, Bravo Burgundy, Crumb Cake
Ink: Bravo Burgundy, Crumb Cake
Accessories: Big Shot, Simple Letters Alphabet Bigz Dies, Large & Extra-Large Tag Punches, Boho Blossoms Punch, Gold Brads
20 January 2011
Birthday Card Books


They were really easy to make and you can find instructions here if you’d like to make one also. Click here for one I made for myself previously. They each cost around $15 to make, using 1/2 a pack of designer paper plus $5 to get spiral bound. I also put a piece of acetate front and back (it's hard to see in the photos) to give extra protection.

Cardstock: Daffodil Delight, Sunny Garden Designer Series Paper, Designer Series Paper Pack - In Color (Hostess)
Ink: Pear Pizzazz
Accessories: Big Shot, Scallop Circle Bigz Die, Timeless Type Junior Alphabet Medium Sizzlits Die, Two-Step Bird Extra-Large Punch, Basic Rhinestone Jewels.

Cardstock: Very Vanilla, Basic Grey, Elegant Soiree Designer Series Paper
Ink: Baja Breeze, Soft Suede, Crumb Cake, Basic Grey
Accessories: Big Shot, Top Note Bigz Die, Boho Blossoms Punch, Paper Daisy, Circle Ice Rhinestone Brad, Sponge Dauber, Spritzer Tool
Subscribe to:
Comments (Atom)